Campervan Travel Guitar
Introduction
There are lots of things to think about if you're planning a trip in a campervan. The first consideration is obviously which guitar to take. Something small, ideally, and light, and not too precious. I quickly decided that none of my guitars were appropriate and that I should therefore get a new one.
The Internet quickly pointed me in the direction of travel guitars and showed me how cool they are. Unfortunately, it also told me that they're quite expensive. So, having also seen some great DIY travel guitars, I decided to create one myself. Here are my notes for anybody else attempting something similar.
Guitar choice
Before shopping, I thought long and hard about which guitar would be the best starting point, i.e. what would make my life easiest. Here are some of my key considerations:
- Gibson-style guitar: I decided that I'd move the tuners to the body end of the guitar, which is common on travel guitars. The high, tune-o-matic bridge found on most Gibson-style guitars promised to make this task much simpler. The lower bridge on most Fender-style guitars, along with the tremelo gubbins, make this modification less straightforward. That said, Strat copies are plentiful and can be dirt cheap second-hand, so they're always worth considering.
- Bolt-on neck: It's much easier to work on a guitar if it's fully disassembled, and it's much easier to disassemble a guitar that has a bolt-on neck.
- Flat body front/back: Curved faces make everything more difficult: measuring, clamping, cutting, etc. Since I only have basic tools, I like to have as many flat sides as possible.
- Individual tuners, 3-a-side: Not really a necessity - in fact I ended up using some spare tuners that I had. It's important to think about how the tuners will fit in their new location though.
- Pickups/wiring: I wasn't too fussy here, but my preference was for a double-humbucker set-up. While shopping I considered the location and size of the main controls/wiring cavity. The design could be compromised by this cavity, but actually most guitars are quite simple in this respect, especially cheap ones.
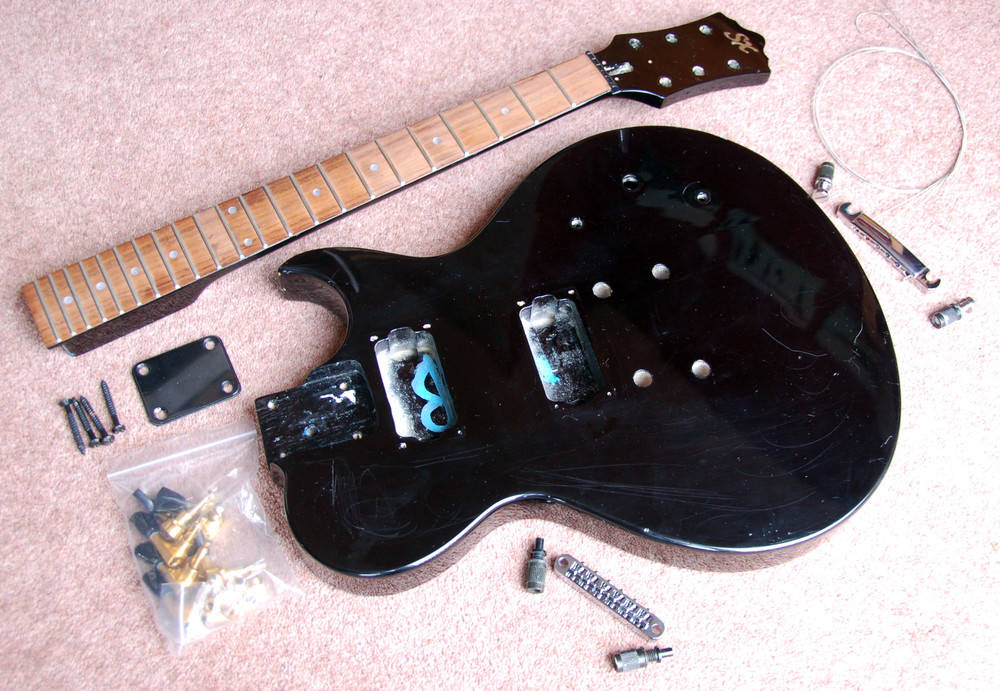
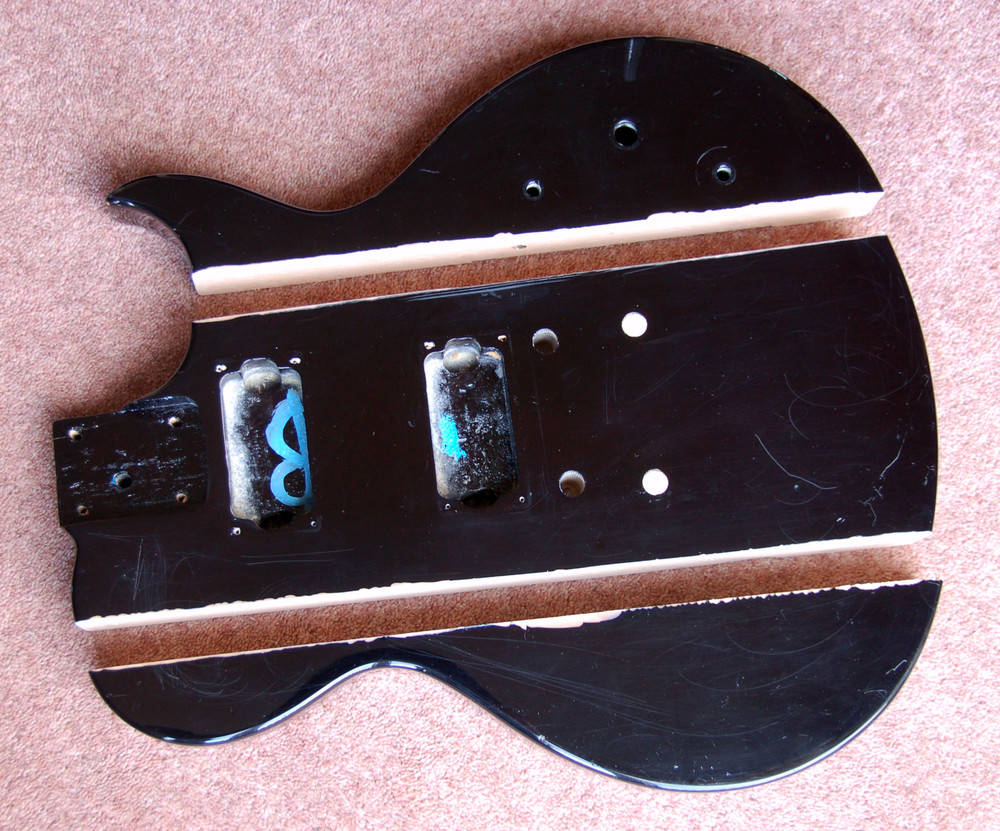
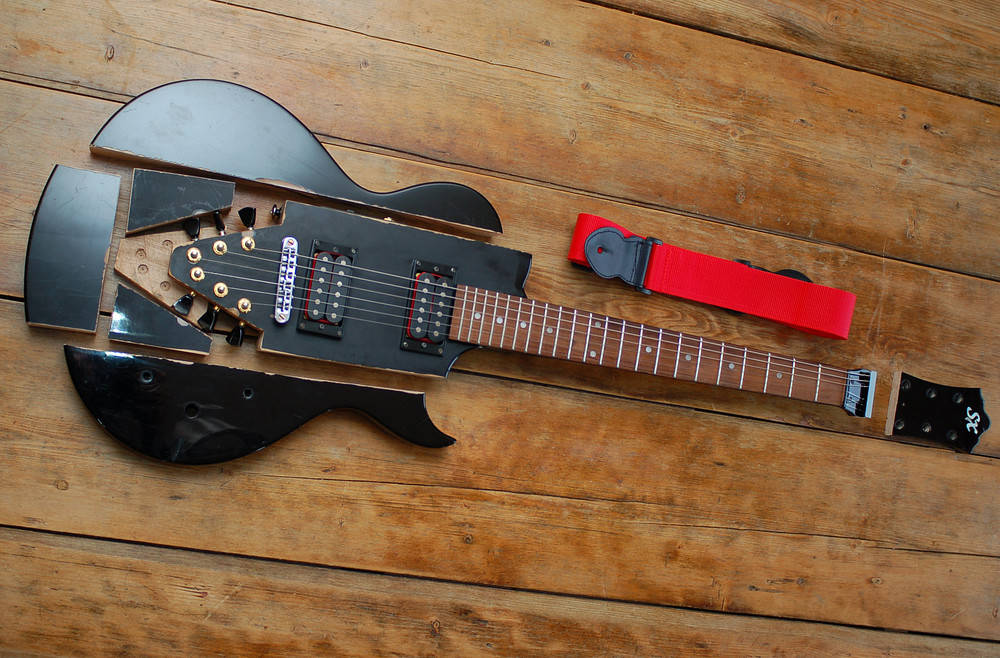
Ultimately I decided that a Gibson SG copy would be ideal, especially as I'm quite fond of the Gibson SG. Unfortunately I didn't find one cheap enough and settled for this basic, LP-style guitar instead.
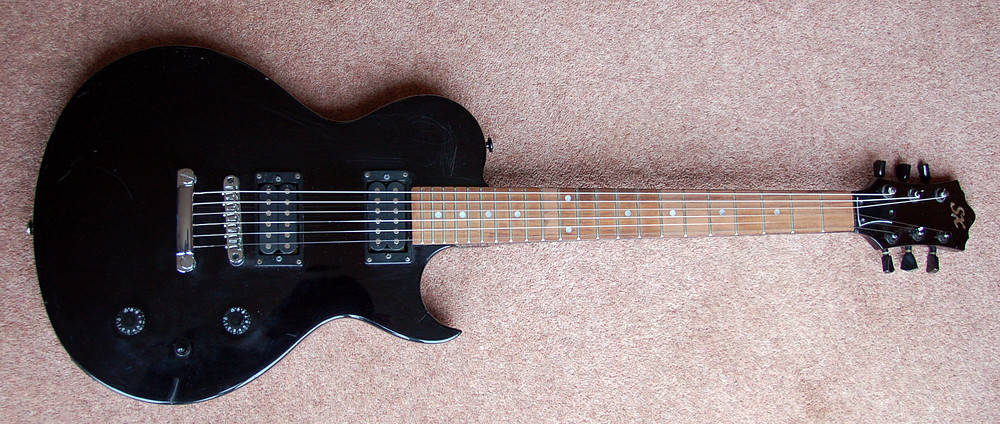
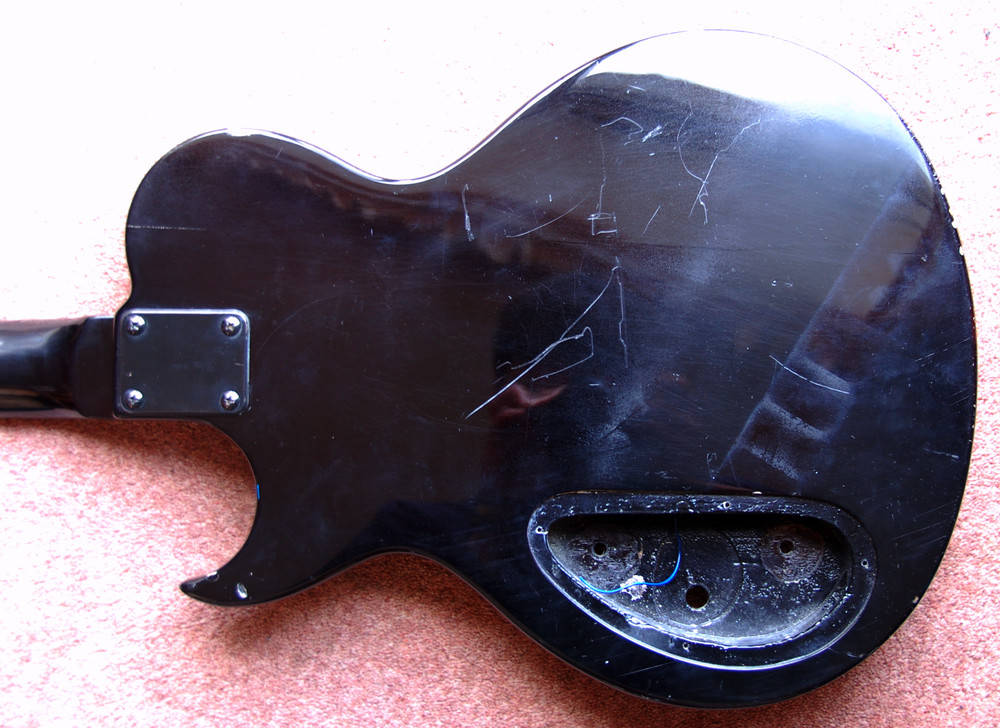
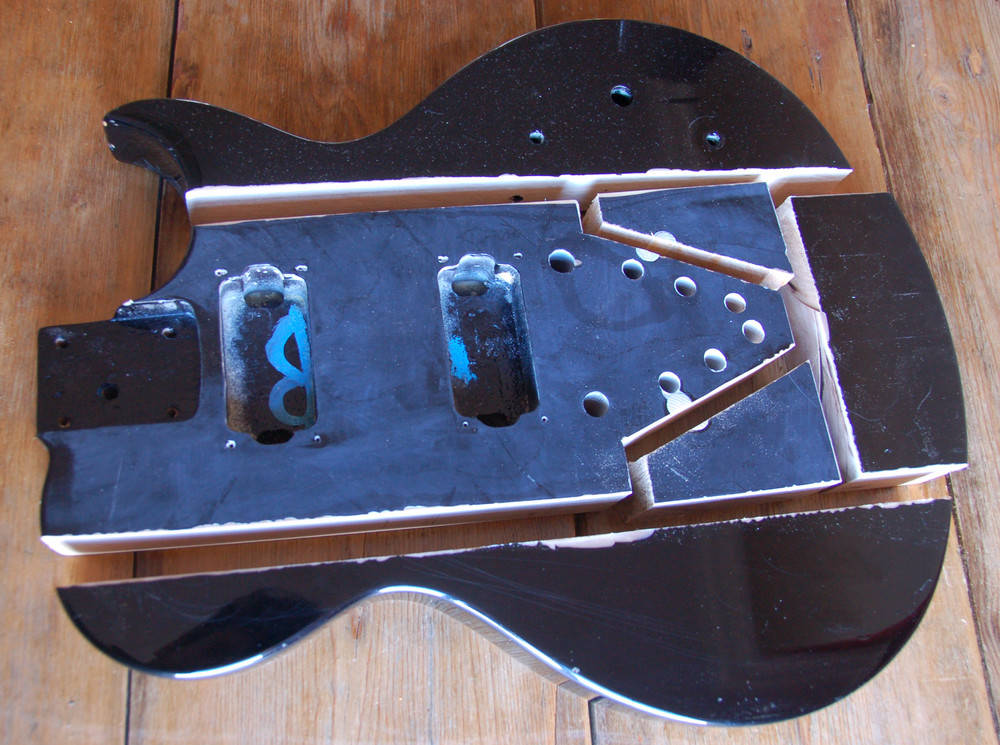
Here are a couple of pictures of the back to show what we're working with here. (I've already removed all of the controls in the second).

The plan in a nutshell
Here's a summary of the overall plan:
- Fully disassemble the guitar.
- Cut the head off the neck.
- Attach something in its place to hold the bullet end of the strings.
- Discard the stoptail and fill the holes that held it.
- Drill holes in the body where the tuners will be relocated to.
- Cut the body right down to size.
- Create a new cavity for controls/wiring.
- Put everything back together.
- Plug in and play.
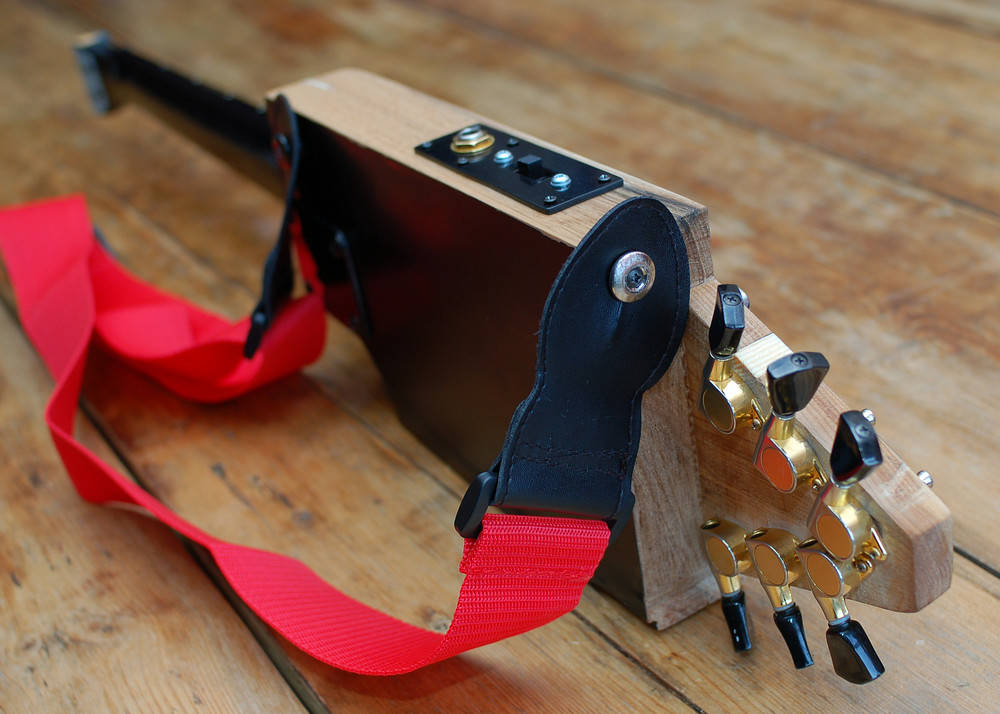
Remember to think about where the strap buttons will go. Also, the tailpiece is usually connected to ground with a wire - as I'm removing it, I'll be connecting the bridge to ground instead.
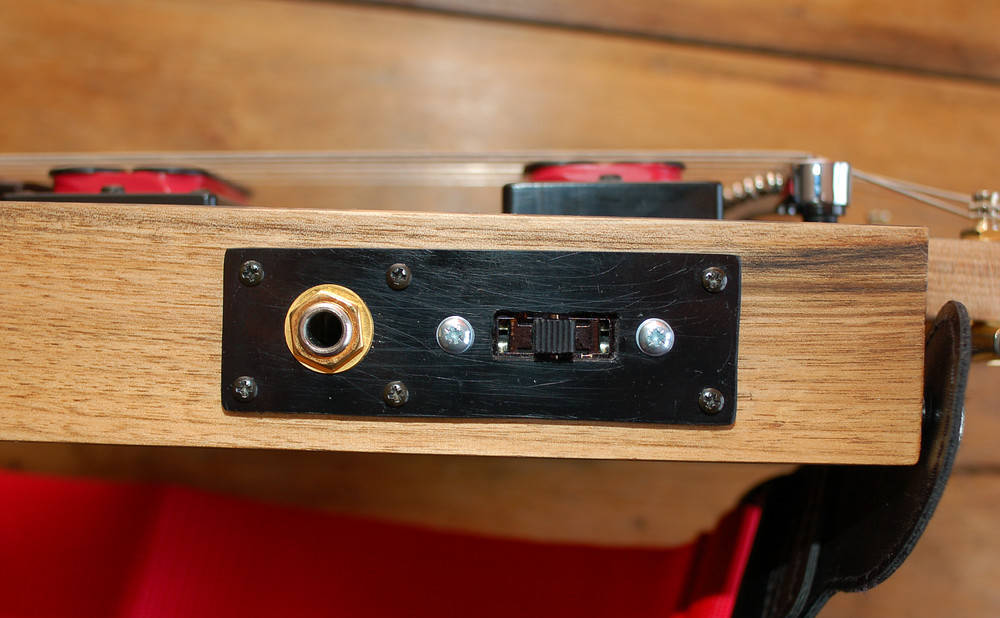
As for wiring, I simplified mine to just a 3-way pick-up selector and a jack socket - no volume or tone control. I mounted the new controls on a rectangle I cut from the original control cavity cover - just standard scratchplate plastic.
Design stage
Before starting I took some measurements and created a reasonably accurate sketch of the final body shape.
Here's the sketch on it's own and overlaid with a photo of the original guitar body.
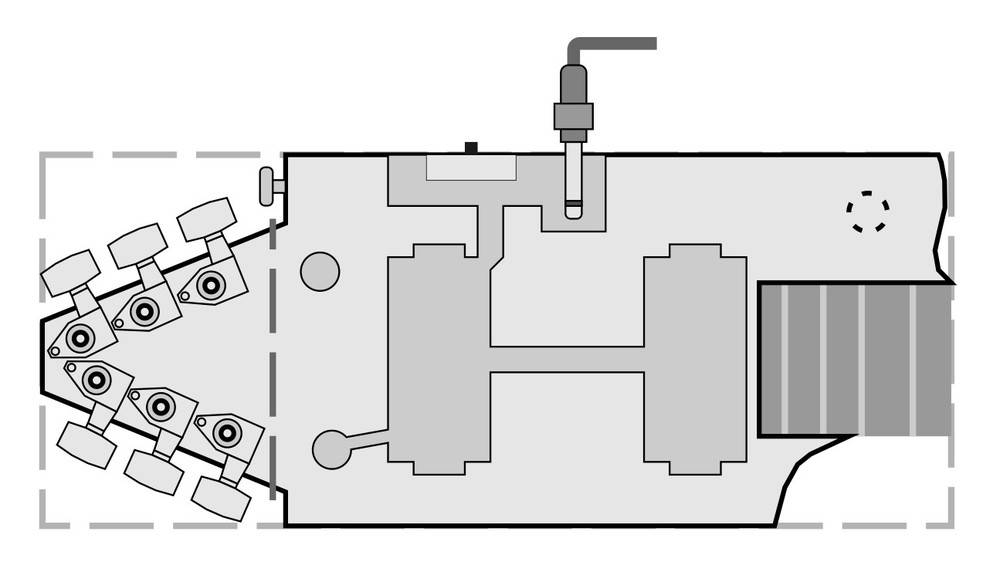

I planned the shape carefully so that I could create it using just straight cuts with a handsaw.
This sketch illustrates pretty much everything I needed to do to the body, although it doesn't illustrate that the section where the tuners have been moved to needs to be made thinner - this will be clear in later pictures.
(The dashed circle shows where a strap button will be located at the rear of the guitar).
Step by step
1. Disassemble, measure and plan
The first job is to completely disassemble the guitar and do lots of measuring and planning. The more you think through up front, the less will go wrong later.
2. Head-ectomy
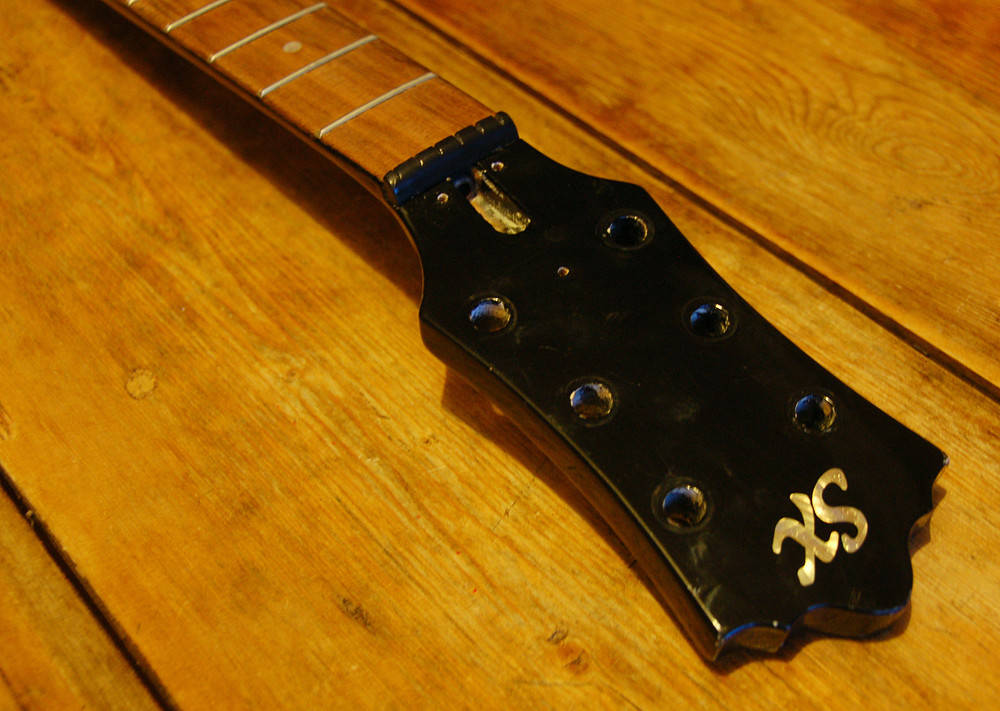
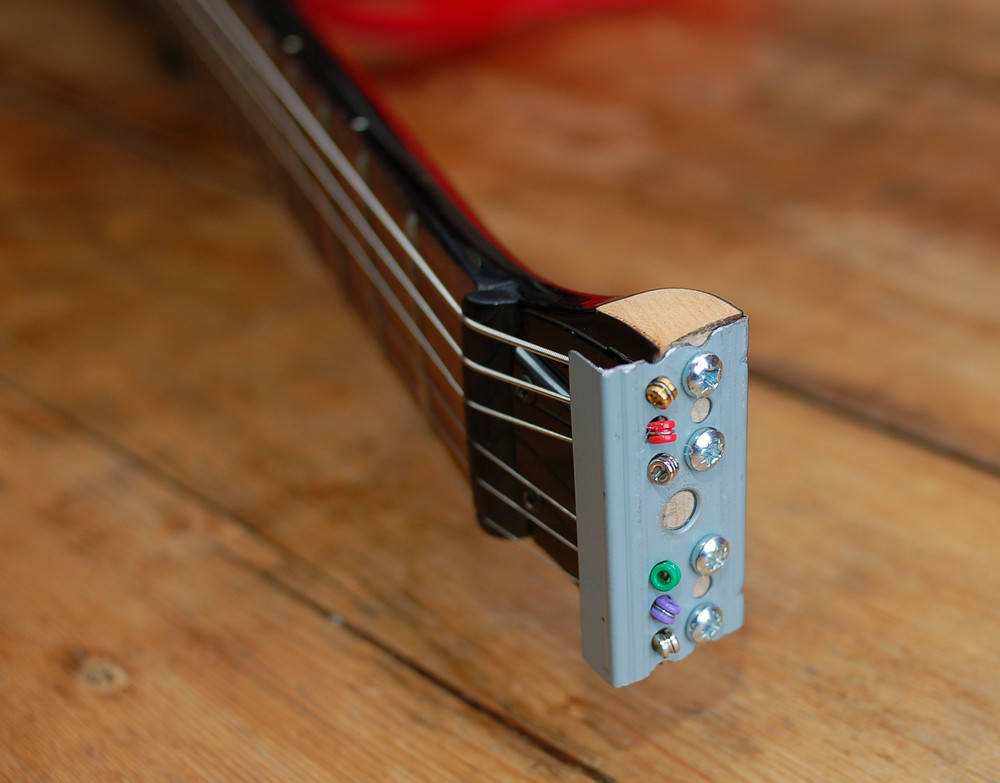
Before removing the head, I decided on how the strings would be anchored at the head end. This determines how much wood to remove from the original head and how to shape it.
A metal bracket is a good option, but I don't have many tools suitable for metal work. So, I was considering removing most of the head and taking the strings through the remaining wood. Some guitars have strings that pass through the body in this fashion. However, I had a rummage around and found an old bracket from a computer case that turned out to be ideal...

As you can see, it even has pre-drilled holes that are positioned pretty well for the strings and some fixing screws. The metal isn't quite as rigid as I had in mind, but actually it's fine, especially as it holds the strings close to the face of the head.
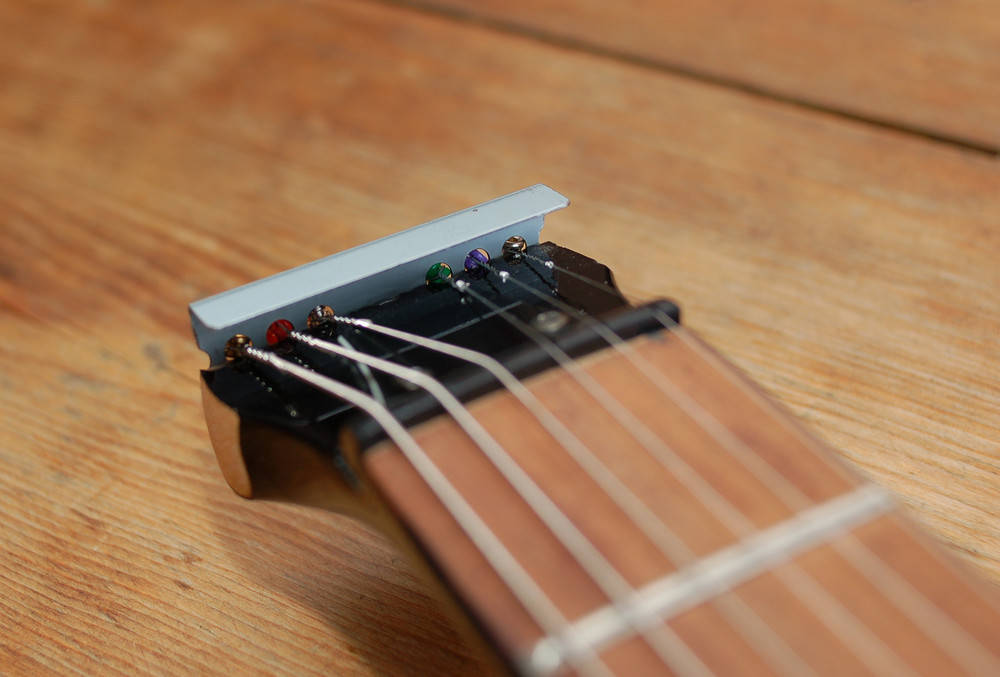
With that sorted I got on with cutting the head off the neck of the guitar.
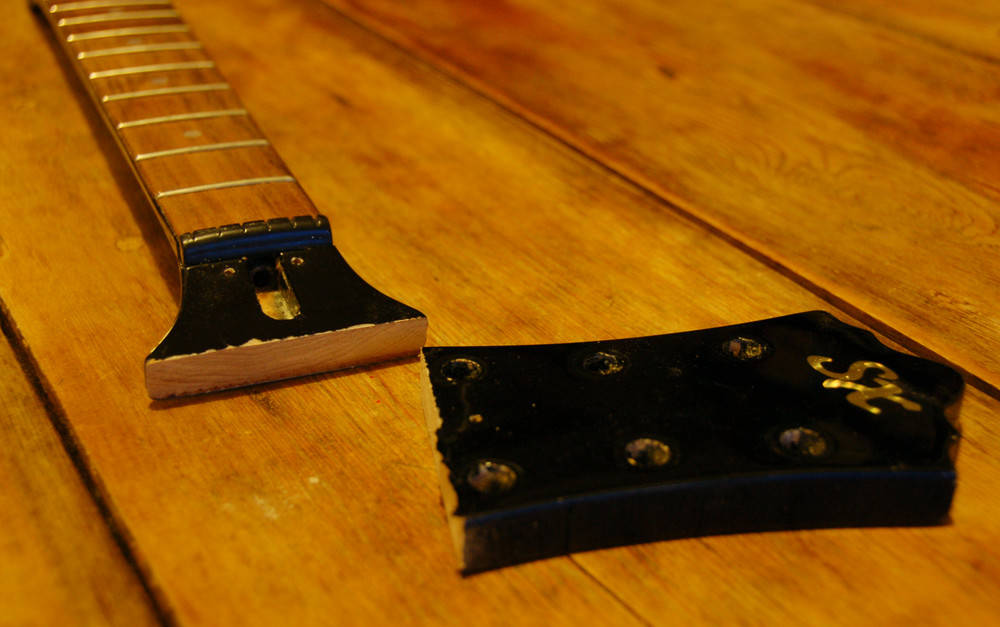
I also shaped the truss rod cover to fit.


After a little more shaping of the head and bracket, here is the result.
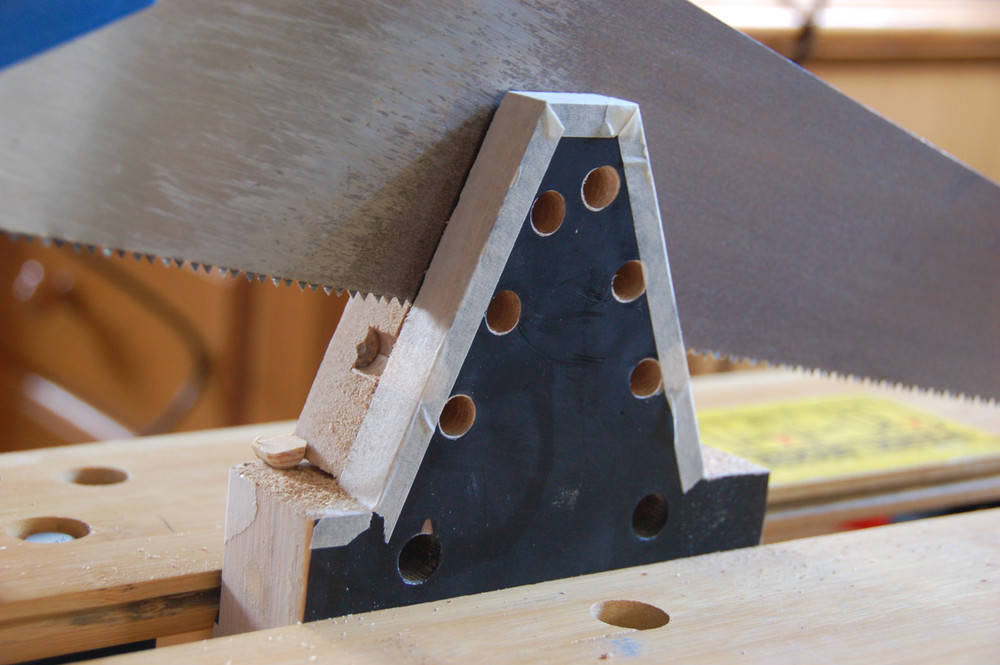
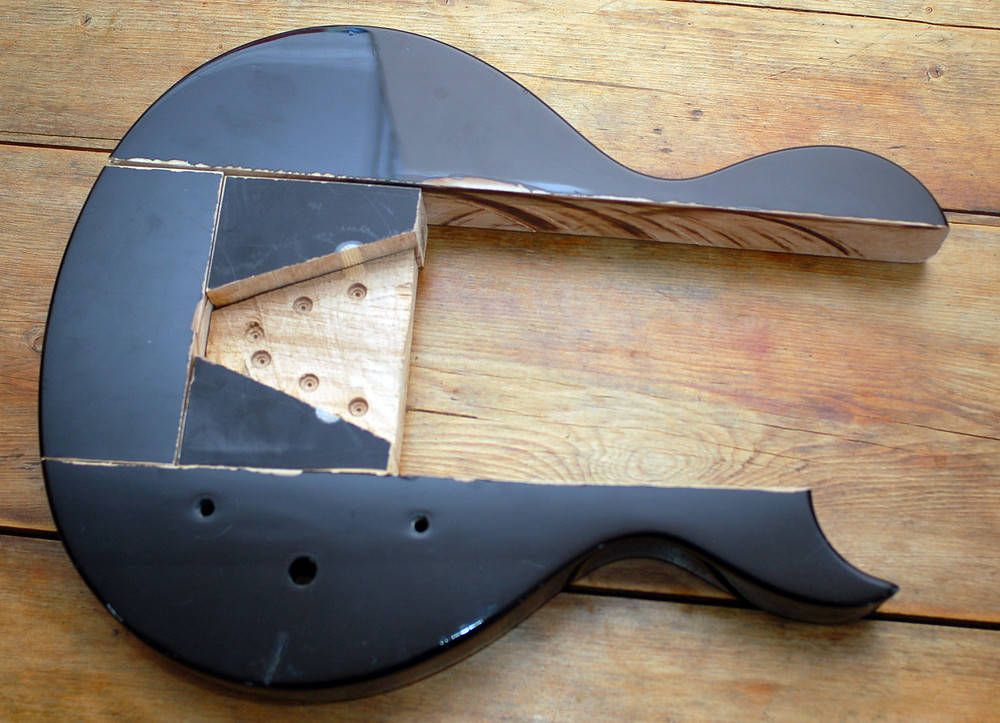
3. Body-shaping
This is just cutting and drilling really, so I'll let the pictures do most of the talking.

I started off by filling the holes that held the tailpiece in place. This was just a case of bashing suitably sized dowel into the holes with some wood-glue, cutting them down and sanding them flush. You can see them filled in the first picture here.
I have a cheap table saw that I used for the initial two longer cuts. The saw wasn't actually quite large enough to cut right through the body. It still did the job, but I probably would have been better off just using a hand saw. Of course, if you do have access to a good table saw, then it would make the initial straight cuts much quicker and straighter.
I used masking tape a lot to provide a surface I could draw on, which worked well. You can see the tape and markings in a couple of these pictures.
I only have a hand-held drill, so I made a little jig to help me drill in the right place and perpendicular to the surface, which you can see in use above. I still managed to slip on one of the holes, which I had to dowel and re-drill it later. I should have been more careful, but it's all fine despite this mistake. You might be able to tell from the pictures that I didn't drill all the way through the body as I'd be cutting the back off afterwards anyway.
Fortunately, nothing here needs to be super-precise. The bridge and nut are staying put, so it should be possible to set-up and tune the guitar as well as before (or better even, given that budget guitars are rarely set-up very well).
4. Wiring
As I mentioned earlier, I opted for a minimal set of controls. I don't need tone or volume controls on this guitar - I'm happy to control these externally. So, I'm just wiring the two pickups to a 3-way switch and then on to a jack socket.
Again, I started by measuring, planning and sketching the layout. The diagrams below show the cavity I needed to create and the control layout. You can also see the hole I needed to drill from the bridge post to the pickup cavity for a ground connection. (I think I actually ended up drilling through from the other post, but that's not important).
To mount the controls, I cut a rectangle of plastic from the plate that covered the controls on the original guitar.
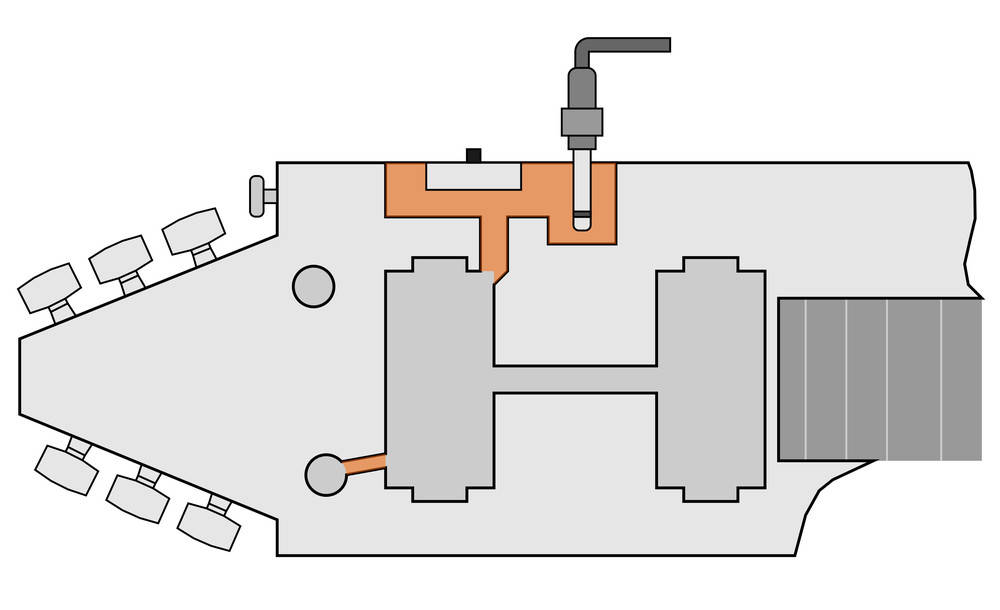

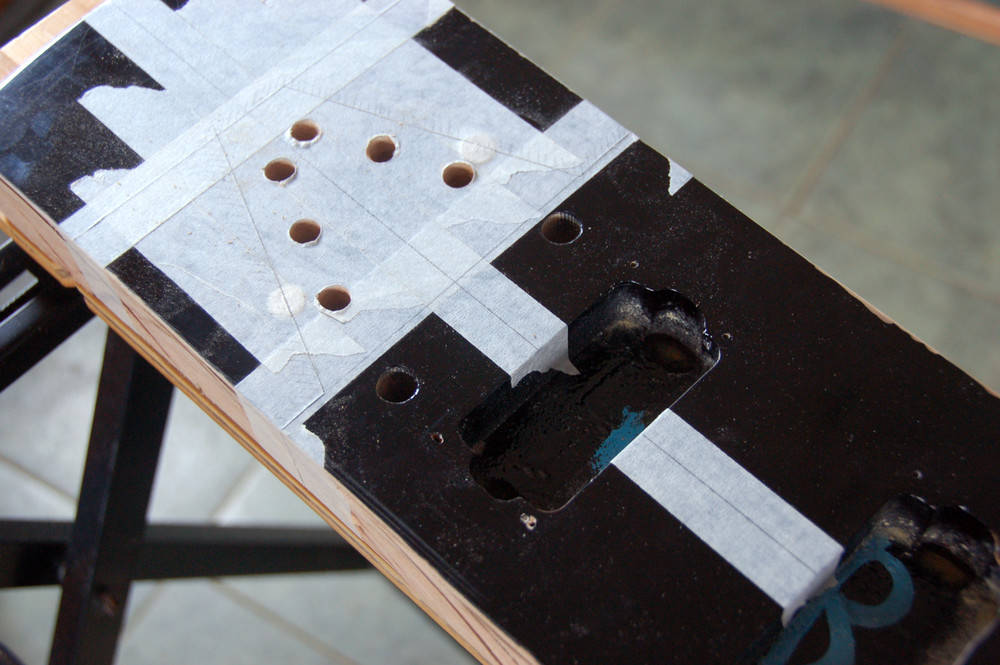
With the planning done, I mounted the controls on the plastic plate and created the main cavity in the top of the guitar. I used a large, flat wood drill bit to drill out the bulk of the space before enlarging and tidying it with a chisel.
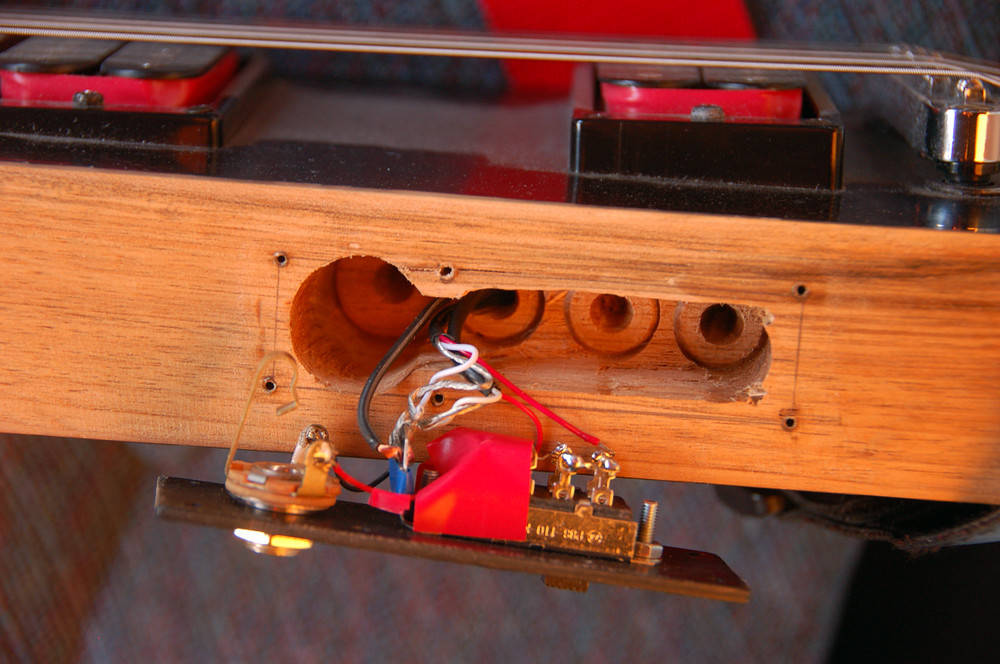
You can see the four drill locations in the picture above. I used a larger bit and drilled deeper for the jack socket, then made three smaller, shallower holes to form the rest of the cavity. A sharp chisel made quick work of the wood left between drill holes. I also drilled a small hole through to the bridge pickup cavity to pass wires through.
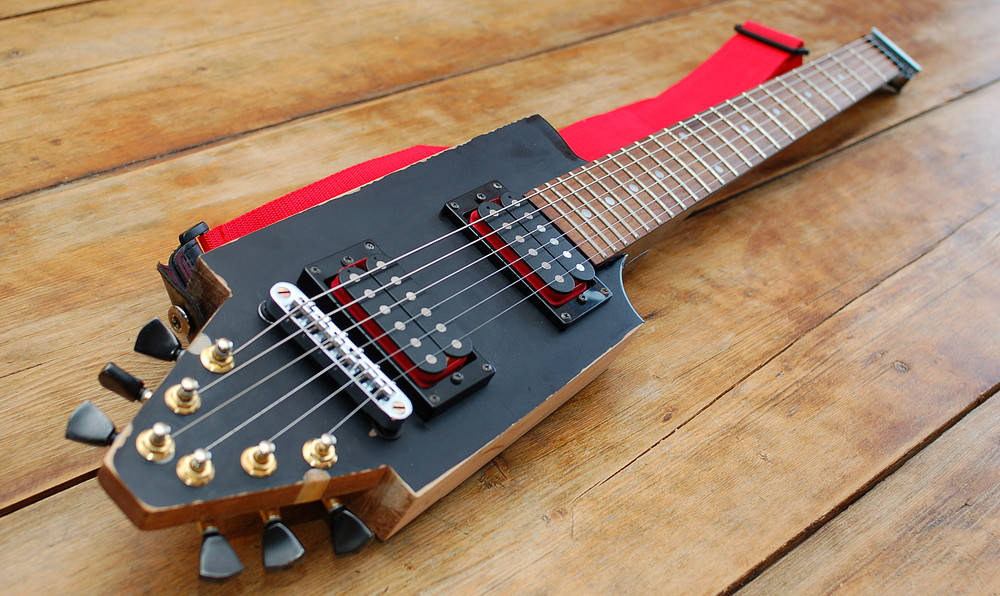
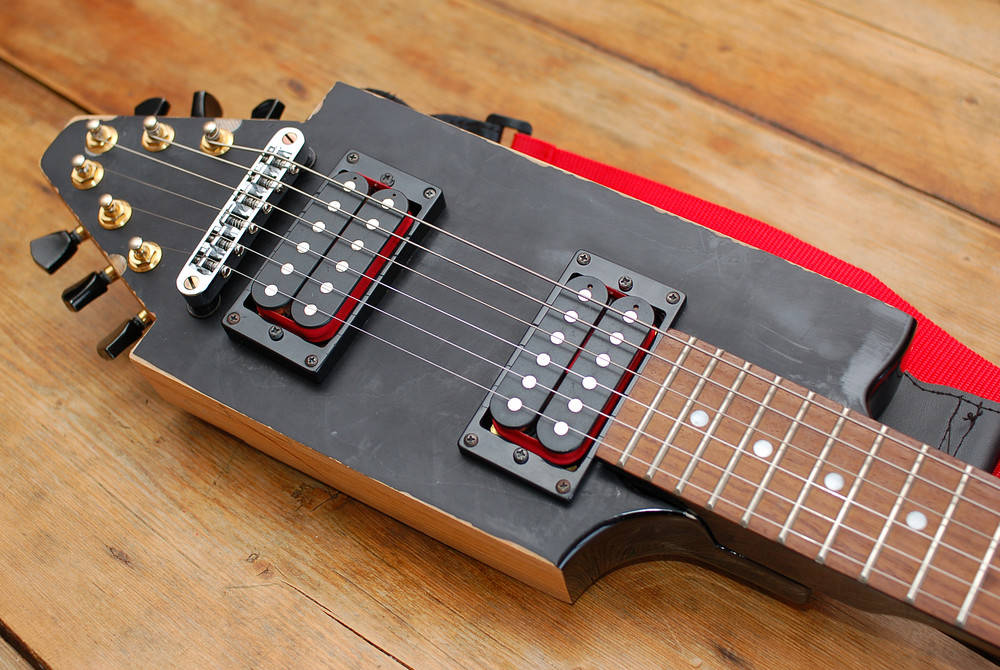
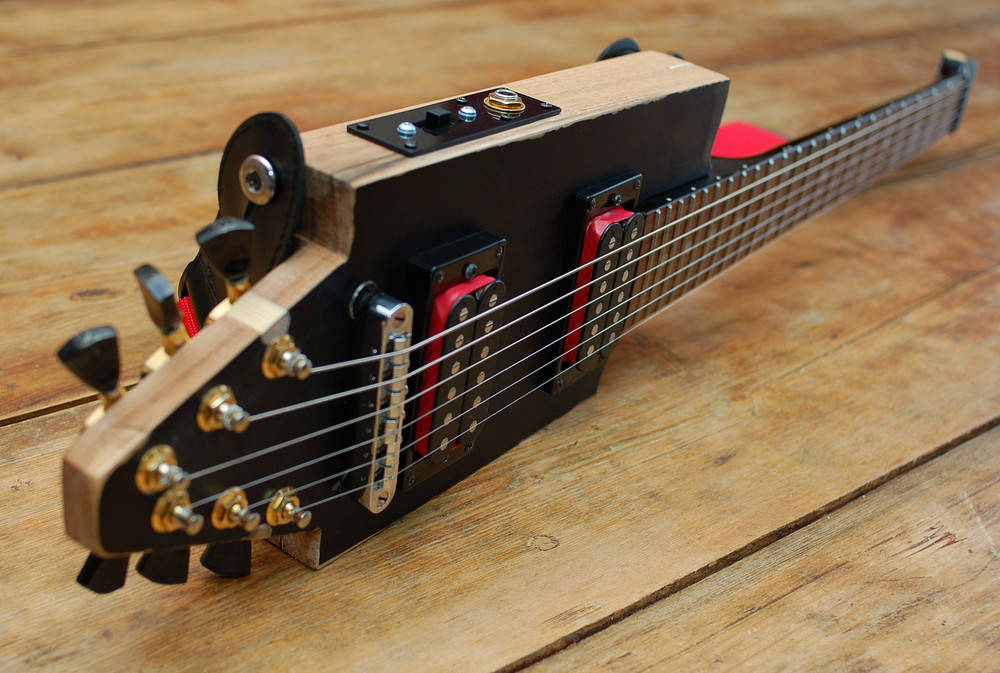
5. Glamour shots
That's basically it. I put everything back together, set it up as well as I could and I'm perfectly happy with the result. Here are a few more pictures to demonstrate the finished guitar.
That's it. Thanks for reading. If you found any errors or ommissions then please e-mail me and let me know.
Other reading
Here are links to the two articles that inspired me to take this on. The first is more basic and very similar to what I ended up doing. The second is far more advanced and utilises a well-equipped workshop.
Building a Travel Electric Guitar